
You can make an iPad senior friendly by enlarging text, simplifying settings, and adding helpful accessibility tools.
Learning how to make iPad senior friendly is about removing small barriers that can make a screen feel confusing. With the right display, touch, sound, safety, and communication settings, an iPad can become a simple tool for video calls, photos, news, games, and health reminders.
Why Make an iPad Senior Friendly?
An iPad can help older adults stay connected and independent. It can provide access to family video calls, digital books, medical portals, weather updates, music, and hobbies. However, small text, crowded screens, weak sound, and complex gestures may create frustration.
The goal is not to change every setting. The goal is to create a calm, clear experience that matches the user’s needs. Think of the iPad as a room: good settings improve the lighting, remove clutter, and put important items within easy reach.
When you make an iPad senior friendly, ask these questions:
- Can the user read the screen without squinting?
- Can the user hear alerts and video calls?
- Can the user tap buttons without trouble?
- Can the user find the apps they use most?
- Can the user recover from a mistake?
- Can a trusted family member offer help when needed?
These questions are more useful than simply turning on every accessibility feature. Too many changes at once can make the iPad feel unfamiliar.
Start With the Display
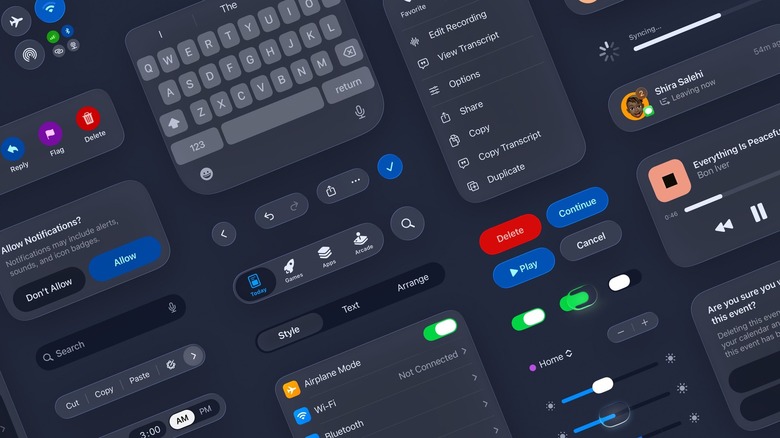
The display is often the best place to begin. Larger text and stronger contrast can make menus easier to read. These changes are especially helpful for people with low vision, tired eyes, or age-related vision changes.
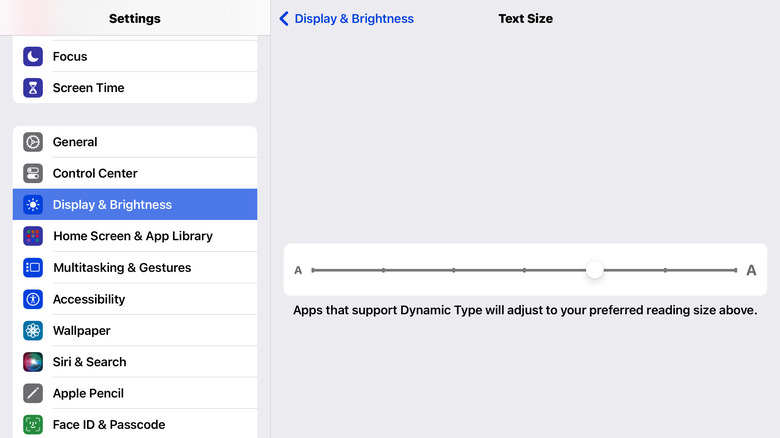
Open Settings, then choose Display & Brightness. Adjust the following options:
- Increase the text size with Text Size.
- Turn on Bold Text if letters look too thin.
- Use Display Zoom to make buttons and controls larger.
- Set Brightness to a comfortable level.
- Turn on True Tone if the screen feels harsh in changing light.
- Use Night Shift in the evening if warmer colors feel more comfortable.
You can also change text size for supported apps. Go to Settings, choose Accessibility, then Display & Text Size, and open Larger Text. Turn on Larger Accessibility Sizes if more control is needed.
Keep in mind that not every app responds to larger text. Some apps may keep their own text size. Test the apps your family member uses most, such as Messages, Mail, Safari, and FaceTime.
Reduce visual clutter by using a simple wallpaper. A plain image with strong contrast can make app icons easier to spot. Avoid busy photographs behind the icons.
Improve Touch and Button Control
Many seniors have stiff fingers, tremors, arthritis, or less precise touch. A small icon that works for one person may be hard for another. Touch settings can make the iPad more forgiving.
Go to Settings, select Accessibility, and open Touch. Then review these options:
- Touch Accommodations can help the iPad respond better to taps and swipes.
- Hold Duration can help prevent accidental touches.
- Ignore Repeat can stop repeated taps from opening an app twice.
- AssistiveTouch can provide an on-screen menu for common actions.
- Haptic Touch settings can make press-and-hold actions easier to understand.
The Home Screen and Multitasking settings can also reduce confusion. If the user often opens apps by accident, teach them one simple way to return to the Home Screen. On an iPad without a Home button, swipe up from the bottom edge. Practice this movement slowly.
A physical stand can help too. Holding an iPad for a long time can be tiring. A stable stand keeps the screen at a useful angle and leaves both hands free for tapping.
A useful lesson from helping people with new devices is to avoid teaching every gesture at once. Start with three actions: tap an app, swipe to another page, and return to the Home Screen. Add more only when those actions feel natural.

Make the Home Screen Simple
A crowded Home Screen can feel like a messy desk. Remove apps that the senior does not use often, and place important apps on the first page.
Useful apps may include:
- FaceTime
- Messages
- Photos
- Phone or Contacts
- Safari
- Calendar
- Maps
- Weather
- Health
- A favorite news or reading app
To move an app, touch and hold its icon until the menu appears. Choose the option to edit the Home Screen, then drag the app to a new position. The exact wording may vary by iPadOS version.
Place the most important apps in the same spots every time. For example, put FaceTime in the top-left corner and Messages beside it. A stable layout helps the user build memory through repetition.
Remove extra Home Screen pages if they create confusion. You can also place less-used apps in one clearly named folder, such as “More Apps.” Do not create too many folders. A folder system that makes sense to a power user may feel like a maze to a beginner.
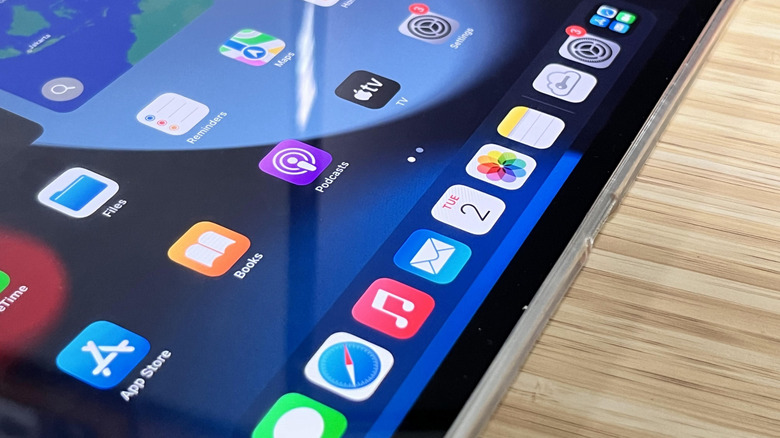
Keep the Dock simple. Add only the apps the user opens often. A short Dock is easier to understand than one packed with icons.
Make Sound and Alerts Easier to Notice
Hearing changes are common with age. A senior may miss a quiet alert even when the iPad is working properly. Sound settings can help the user notice calls, messages, and reminders.
Open Settings, then choose Sounds & Haptics. From there:
- Raise the alert volume.
- Choose a clear ringtone and alert sound.
- Turn on Change with Buttons only if accidental volume changes are unlikely.
- Turn on keyboard clicks if sound helps confirm each tap.
- Enable lock sounds if they provide useful feedback.
For people who have trouble hearing speech, connect compatible hearing devices through Settings and Accessibility. The iPad may also offer audio and visual tools such as:
- Mono Audio, which sends the same sound to both sides.
- Balance controls for uneven hearing.
- Subtitles and caption settings for supported videos.
- LED Flash for Alerts, where available.
- Sound Recognition for selected environmental sounds.
Sound Recognition should not replace smoke alarms, medical alerts, or personal supervision. It may not detect every sound, and background noise can affect results.
When setting up video calls, test the volume in the room where the iPad will be used. A setting that sounds loud in a quiet office may be too soft in a living room.
Set Up Siri and Voice Control
Voice tools can reduce the need for small buttons and complex menus. Siri can help with calls, reminders, weather, messages, and simple questions.
To set up Siri, open Settings and look for Siri or Apple Intelligence & Siri, depending on the iPad model and software version. Review the options for listening for the wake phrase, pressing the top button, and allowing Siri when the device is locked.
Show the senior a few useful commands:
- “Call Maria.”
- “Remind me to take my medicine at 8 a.m.”
- “What is the weather today?”
- “Set a timer for 10 minutes.”
- “Open Photos.”
- “Read my messages.”
Voice Control is different from Siri. It lets a person control parts of the iPad with spoken commands. Open Settings, choose Accessibility, then Voice Control. This feature can help users who have trouble tapping, but it may take practice.
Keep commands short. A senior does not need to learn a long list. Start with one or two commands that solve a real daily problem.
Also explain that voice assistants can misunderstand speech. Avoid using Siri for urgent health or safety needs unless another reliable method is available.
Improve Safety and Privacy
Making an iPad senior friendly also means making it safe. A simple setup should protect personal information without creating unnecessary barriers.
Use a passcode that the user can remember but others cannot guess. Avoid simple choices such as 1234 or a birth year. If Face ID or Touch ID works well for the user, set it up as a convenient way to unlock the iPad.
Review these privacy settings:
- Location Services
- Microphone access
- Camera access
- Contacts access
- Photo access
- App tracking requests
- Notifications shown on the Lock Screen
Turn off notifications from apps that are not important. Too many pop-ups can cause worry and make the iPad seem broken.
If a trusted family member helps with the iPad, explain privacy boundaries clearly. Remote help can be useful, but the senior should know who can access the device and what that person can see.
Set up Find My if appropriate. This can help locate a misplaced iPad. Keep the device updated, since software updates often include security fixes and accessibility improvements. Before an update, make sure the iPad is charged and connected to Wi-Fi.
A backup is also important. Photos, contacts, and other information are difficult to replace. Confirm that the device backs up through iCloud or another trusted method.

Make Communication Quick and Reliable
For many seniors, the main reason to use an iPad is to stay in touch. Make communication as direct as possible.
Add important people to Contacts with clear names and photos. A face photo can be easier to recognize than a name. Place favorite contacts where they are easy to reach, such as in the FaceTime or Messages app.
Create a short family video call routine:
- Open FaceTime.
- Choose the family member’s photo.
- Tap the video button.
- Wait for the person to answer.
- Tap the red button when the call ends.
Practice this routine several times. Repetition reduces stress when the user later makes a call alone.
For people who struggle with typing, use dictation. Tap the microphone on the keyboard and speak the message. Teach the user to pause between sentences and say punctuation when needed.
Messages can be easier when conversations are pinned. Pin the most important family chats so they appear near the top. Keep group chats limited if a busy stream of alerts becomes confusing.
You can also create a printed card with simple instructions. Include the name of the app, the icon’s appearance, and the steps to make a call. A small card beside the iPad can be more helpful than a long manual.
Choose Senior-Friendly Apps
The best apps for seniors are not always the most advanced. They are the ones with clear buttons, readable text, and few distractions.
Look for apps that offer:
- Large controls
- Simple menus
- Strong color contrast
- Clear instructions
- Captions
- Voice support
- Reliable customer help
- No confusing in-app purchases
Useful categories include video calls, digital photo albums, crossword puzzles, audiobooks, library apps, medication lists, weather, news, and faith or community services.
Before installing an app, check its privacy details and subscription terms. Some free apps contain ads or ask for payment after a trial. Explain these details before the user taps a purchase button.
Do not install many apps in one session. Add one app, explain it, and let the senior try it for a few days. This approach helps reveal what is truly useful.
Remember that an iPad cannot replace professional medical care, emergency services, or a formal medication management plan. Health apps can support daily routines, but their accuracy and features vary.
Use Guided Access and Assistive Features
Guided Access can keep the iPad inside one app. This is useful when a senior accidentally leaves a video call, opens ads, or taps unfamiliar buttons.
Find Guided Access under Settings and Accessibility. Set a passcode, open the chosen app, and start Guided Access with the required button shortcut. The steps can vary by model, so practice before using it in an important situation.
AssistiveTouch can place common controls on the screen. It may provide quick access to the Home Screen, volume, screenshots, and other actions. This can help when physical buttons are hard to press.
Switch Control is designed for people who have significant movement limitations. It can be powerful, but it may be too complex for a basic setup. Use it only when simpler touch and voice options are not enough.
Zoom can enlarge part of the screen. It is useful for reading small details, but it can also make navigation harder if turned on by accident. If you enable Zoom, teach the user the gesture for turning it off.
Accessibility features work best when they solve a specific problem. A feature that helps one person may confuse another. Test each tool with the user, not just for the user.
Teach the iPad in Small Steps
A senior-friendly iPad setup is only successful if the person feels confident using it. Training should be calm, slow, and practical.
Use this teaching plan:
- Explain one task.
- Demonstrate it once.
- Let the senior perform it.
- Ask them to repeat it later.
- Write the steps in plain language.
- Review the task the next day.
Avoid taking the iPad away and doing everything yourself. That may be faster at first, but it can reduce confidence. Let the user make safe mistakes.
Use everyday language. Say “tap the blue camera button” instead of “launch the video communication application.” Point to the screen without rushing. Give the person time to respond.
A common mistake is changing the layout every time someone visits. Once the iPad feels familiar, keep the settings stable. If changes are needed, explain what changed and why.
A printed guide might say:
- Tap the FaceTime icon.
- Tap Susan’s picture.
- Tap the green video button.
- Wait for Susan to answer.
- Tap the red button to end the call.
Large print and simple pictures can make this guide even more useful.

Check the Setup Regularly
Technology needs occasional care. Set a monthly check-in to review the iPad without taking control away from the senior.
Check the following:
- Battery health and charging habits
- Wi-Fi connection
- Software updates
- Available storage
- Backup status
- App subscriptions
- Notification settings
- Unwanted pop-ups
- Contacts and emergency details
Clean the screen with a soft, slightly damp cloth made for electronics. Do not spray cleaner directly onto the iPad. A protective case with raised edges can reduce damage from drops.
Use a charging station in a fixed place. A bright label near the charging port can help users who find the cable difficult to connect. Some cases make charging ports harder to reach, so choose a case that balances protection and ease of use.
Pay attention to new problems. If the senior suddenly struggles with tasks they once handled easily, the issue may not be the iPad. Vision, hearing, memory, or motor changes may need attention from a qualified health professional.
Common Mistakes to Avoid
Even helpful changes can cause problems if they are not tested. Avoid these common mistakes when you make an iPad senior friendly:
- Installing too many apps at once
- Making text large but leaving buttons crowded
- Using a complex passcode that the user cannot remember
- Turning on every accessibility feature
- Changing the Home Screen layout often
- Ignoring Wi-Fi or charging problems
- Leaving payment details without clear purchase limits
- Assuming the senior understands gestures without practice
- Relying on voice recognition for emergencies
- Forgetting to explain software updates
The best setup is personal. One senior may need very large text, while another may prefer normal text and stronger sound. Some people enjoy learning new features. Others want only a few familiar tools.
Ask what the user wants to do first. Their answer should guide the setup.

Frequently Asked Questions About How to Make iPad Senior Friendly
What is the easiest way to make an iPad senior friendly?
Start by increasing text size, using Display Zoom, raising the alert volume, and simplifying the Home Screen. Then add only the accessibility features that solve a specific problem.
How do I make iPad icons larger for an older adult?
Open Settings, choose Display & Brightness, and select Display Zoom if the option is available. You can also increase text size under Accessibility, although app icons and text are controlled by different settings.
Can I lock an iPad to one app for a senior?
Yes. Guided Access can keep the iPad inside one app, such as FaceTime or a puzzle game. Set it up under Settings and Accessibility, and create a passcode that a trusted helper can manage.
How can I help a senior with shaky hands use an iPad?
Touch Accommodations, AssistiveTouch, a stable stand, and a protective case can help. Adjust one setting at a time and test it with the user, since too much delay can make normal taps feel unresponsive.
Is an iPad safe for seniors to use for health information?
An iPad can help with reminders, telehealth visits, health portals, and trusted educational content. It should not replace a doctor, pharmacist, emergency service, or professional medication plan.
How can a family member provide remote iPad help?
Use approved support tools, video calls, or screen-sharing features available on the user’s device and app. Always explain when access is being given, protect passwords, and avoid sharing sensitive information through untrusted services.
Should I remove the iPad passcode for easier access?
Usually, no. A passcode protects photos, messages, accounts, and health information. Choose a memorable code, and use Face ID or Touch ID when it works reliably for the user.
Conclusion
To make an iPad senior friendly, focus on clarity, comfort, safety, and routine. Increase text size, improve sound, simplify the Home Screen, adjust touch controls, set up trusted contacts, and teach one task at a time.
The most effective setup is not the one with the most features. It is the one that helps the senior feel capable and connected. Make a few changes today, practice them together, and keep improving the iPad as needs change. Explore the accessibility settings with your family member, and share your most helpful setup tips in the comments.

Michael Reynolds is a senior contributor at RetirementGazette.com, where he focuses on helping readers navigate the journey toward a secure and fulfilling retirement. With over a decade of experience in personal finance, retirement planning, and lifestyle writing, Michael combines practical strategies with easy-to-understand guidance tailored for both pre-retirees and those already enjoying their golden years.