Installing a stair handrail in a U.S. home usually means fastening a graspable rail to the wall or stair structure at a safe height. Most residential codes based on the International Residential Code (IRC) place the top of the handrail 34 to 38 inches above the stair nosings. Local building departments may use a different code edition or add local rules, so check with your city or county before drilling.
A secure handrail does more than improve appearance. It gives people a stable point to hold while they climb or descend, especially children, older adults, and anyone carrying items. The rail must be easy to grip, strong enough to resist force, and attached to framing—not just drywall.
Handrail vs. Stair Guard: Know the Difference
A handrail is a graspable support that runs along a stairway. A guard is a barrier that prevents someone from falling from an elevated surface, such as an open stair side or balcony.
These parts can work together, but they do different jobs:
- A handrail helps a person keep balance.
- A guard helps prevent a fall from the side.
- A handrail must have a shape that people can grip.
- A guard may include posts, panels, or balusters that are not suitable to hold.
- A stairway may need both a handrail and a guard.
For many U.S. residential stairways, a handrail is required when the stairway has four or more risers. The exact rule depends on the code used in your area and whether the stairs are inside, outside, public, commercial, or part of a one- or two-family dwelling.
Common U.S. handrail dimensions
The following dimensions are common IRC-based requirements for residential work:
| Feature | Common requirement |
|---|---|
| Height above stair nosings | 34 to 38 inches |
| Clearance from wall | At least 1½ inches |
| Circular handrail diameter | 1¼ to 2 inches |
| Top extension beyond stairs | At least 12 inches |
| Bottom extension beyond stairs | At least 12 inches |
| Handrail ends | Returned or terminated safely |
| Support spacing | Follow the manufacturer’s instructions and local code |
These are planning values, not a substitute for your local code. The Americans with Disabilities Act (ADA) has different rules for many public and commercial buildings, including requirements for handrail extensions and clearance. Residential homeowners should not assume that a residential IRC rule applies to a workplace, rental property, school, or public building.

Tools and Materials You Need
Gather the materials before measuring. A basic wall-mounted installation often needs:
- Handrail of the correct length
- Handrail brackets or a compatible mounting system
- Wall screws or structural screws
- Wood blocking, if framing is not in the right location
- Stud finder
- Tape measure
- Pencil
- Level
- Drill and drill bits
- Screwdriver or driver bit
- Miter saw or handsaw, if cutting is needed
- Sandpaper
- Stud sensor or small finishing nail for confirming framing
- Painter’s tape
- Safety glasses
Use brackets made for handrails. Ordinary shelf brackets may not withstand the force placed on a stair rail.
Choose a rail with a graspable profile. A large square board may look like a handrail but can be hard to hold. A round rail or a properly shaped oval rail is often easier to grip.
Before buying the rail, measure the stair run and decide whether the rail will extend past the top and bottom steps. Add those extensions to the length of the sloped section.
A simple length estimate
For a straight stairway, measure:
- The horizontal distance from the top nosing to the bottom nosing.
- The vertical distance between those two nosings.
- The desired extension at each end.
Use this right-triangle formula for a close estimate:
Rail length = √(horizontal run² + vertical rise²) + top extension + bottom extension
For example, a stair run with a 120-inch horizontal distance and a 72-inch vertical distance has a sloped length of about 140 inches. Adding 12 inches at both ends gives a rail length of about 164 inches.
This is a planning estimate. The actual length may change because of wall returns, angled cuts, decorative ends, and the way the rail meets a newel post or landing.

How to Install a Wall-Mounted Stair Handrail
The safest method is to attach each bracket to a wall stud or to solid blocking installed between studs. Do not rely on drywall anchors alone for a stair handrail.
1. Check the stairway and wall
Look for:
- A clear wall surface beside the stairs
- Electrical outlets, switches, plumbing, and heating lines
- Stud locations
- Trim, doors, and landings
- A full-length path for the rail
- Any need for a guard on an open side
If the wall is masonry, plaster over lath, tile, or a thick finished surface, the fastener method may change. If you cannot identify the wall structure, stop and investigate before drilling.
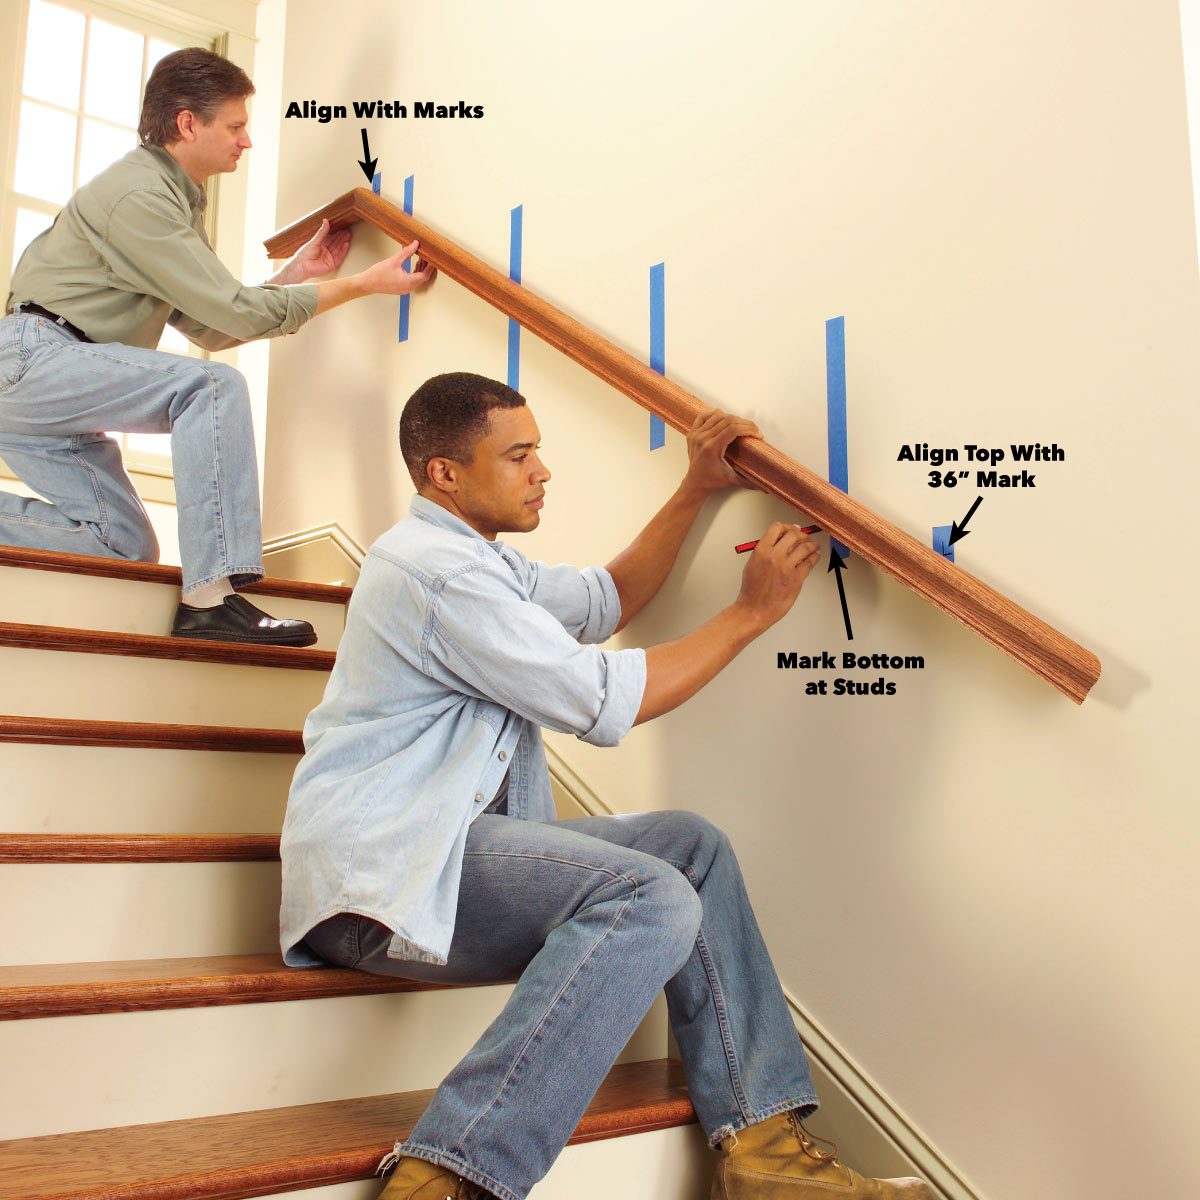
2. Mark the handrail height
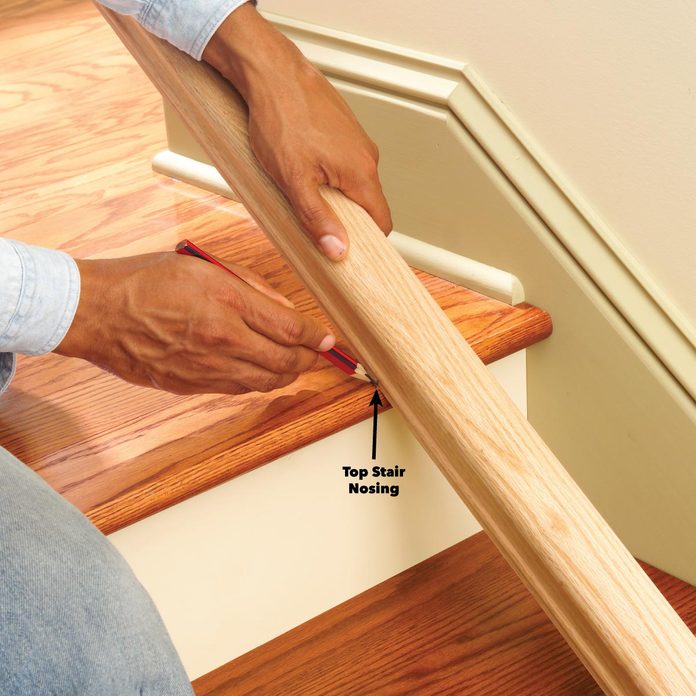
Measure from the front edge, or nosing, of each stair tread. Mark a point 34 to 38 inches above the nosing at the lower end and another point at the upper end.
Use a chalk line or straightedge to connect the marks. This line shows the approximate top-of-handrail location, but remember that some brackets attach below the top of the rail. Read the bracket instructions before placing the marks.
Keep the rail at a consistent height along the stairs. A level held against the sloping rail will not read level with the floor; instead, align it with the stair pitch.
3. Mark the rail extensions
A handrail commonly extends at least 12 inches beyond the top riser and at least 12 inches beyond the bottom riser. The extension should remain usable and should not create a sharp point or a collision hazard.
At the top, the rail may continue horizontally over the landing or return toward the wall. At the bottom, it may return to the wall or end in a safe, finished manner.
Local rules can vary, especially where the rail ends near a doorway, hallway, or narrow landing.
4. Locate the studs
Use a stud finder to locate wall studs. Confirm each location with a small drill bit or finishing nail in an area that the bracket will cover.
Typical wood-stud walls have studs spaced 16 inches on center, but do not assume the spacing. Older homes, stair walls, and remodeled areas may use different layouts.
If the bracket locations do not match the studs, install solid blocking behind the wall before finishing the surface. A small drywall anchor placed between studs is not a reliable substitute for structural support.
5. Plan the bracket layout
Place brackets near the ends of the rail and add intermediate brackets along the span. The correct spacing depends on:
- The rail material
- Rail size and shape
- Bracket design
- Fastener type
- Wall framing
- Local code
- The manufacturer’s instructions
Avoid placing a bracket where it will interfere with a rail joint, return, or decorative fitting. Long rails may flex if too few brackets are used.
A practical layout often places an end bracket several inches inward from each end, with additional brackets distributed evenly. Treat this as a layout principle, not a universal spacing rule.
6. Cut and finish the handrail
Cut the handrail to length only after confirming the layout. Sand cut ends smooth. If the rail has a return to the wall, make the required angled cuts and test-fit the pieces before applying finish.
Seal or paint exposed wood ends. A finished end is less likely to splinter and can better resist moisture and wear.
7. Install the brackets
Hold each bracket at its marked position. Drill pilot holes sized for the structural screws. Drive the screws into the stud or blocking.
Do not over-tighten the screws. Excess force can strip the wood or damage the bracket. The bracket should sit firmly against the wall without crushing drywall or trim.
Check each bracket for movement before attaching the rail.
8. Attach the rail
Set the handrail on the brackets and center it. Use the bracket’s supplied screws or the specified fasteners to attach the rail from below.
Keep the rail straight along the stair slope. If the rail twists, release the fasteners, reposition it, and retighten them. Do not force a warped rail into place, since that can weaken the connections.
9. Check the finished installation
Test the rail with firm pressure at several points:
- Near the lower end
- Near the upper end
- At each bracket
- At the center of each span
- At the extensions
The rail should not wobble, pull away from the wall, rotate, or make cracking sounds. Confirm that the full hand can wrap around the profile and that no screw head, cut edge, or bracket creates a sharp hazard.

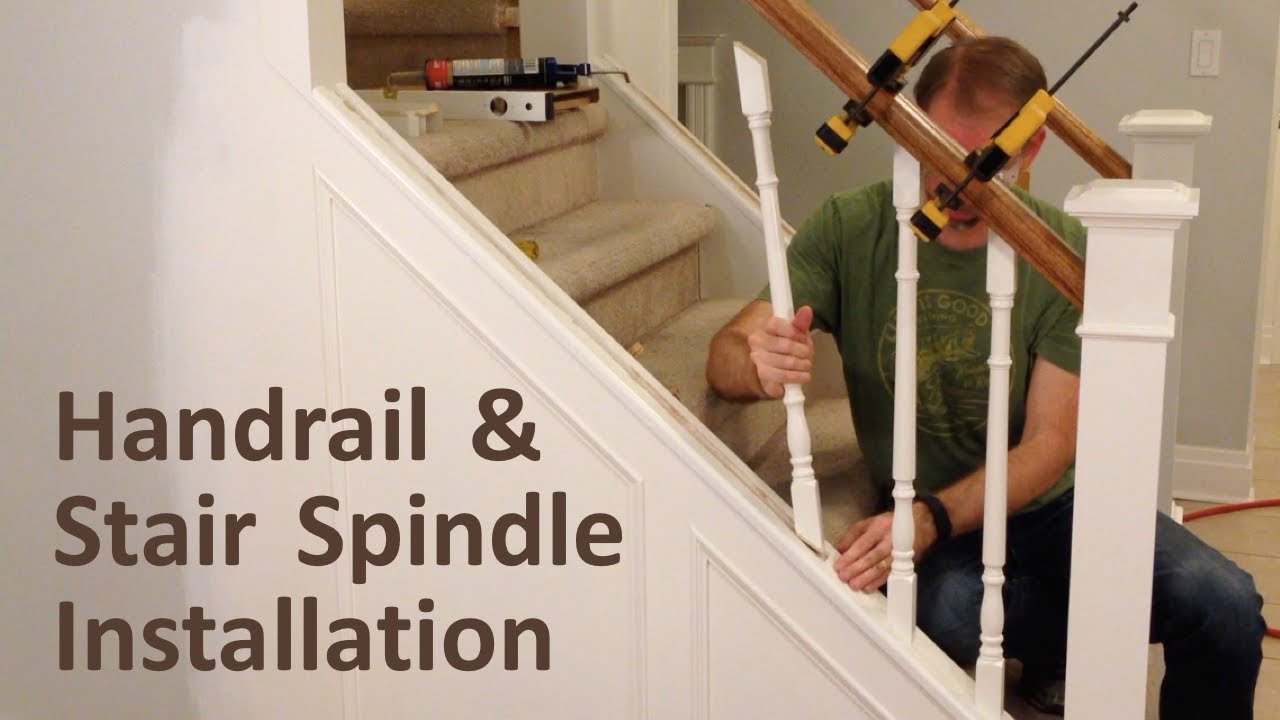
Installing a Handrail on Open Stairs
An open stairway may require a post-mounted handrail rather than a wall-mounted rail. The rail can attach to newel posts, structural stair framing, or a guard system designed to support a handrail.
Do not fasten a handrail only to decorative balusters or thin trim. Posts must transfer the load into the floor, stair stringer, or other structural framing.
Open stairs create extra design and code issues:
- The handrail must remain graspable.
- The open side may need a guard.
- Baluster spacing may be regulated.
- The rail may need to be continuous.
- Post connections must resist movement.
- The rail height still needs to follow the applicable code.
A post-mounted system is often best handled during new construction or remodeling, when blocking and structural connections can be exposed. If the stair is already finished and the posts move when pushed, consult a qualified carpenter or building professional before attaching the rail.
Common Installation Problems and Fixes
The handrail feels loose
Likely causes:
- Screws missed the stud.
- The wall is hollow behind the bracket.
- The bracket is not rated for handrail use.
- The rail is too long for the bracket layout.
- The screw is too short.
Fix: Remove the bracket and inspect the connection. Move it to a stud or install proper blocking. Use structural fasteners that match the bracket instructions.
The rail is too high or too low
Measure from the stair nosings, not from the floor or the top of the baseboard. A sloped stair wall can make visual judgment difficult.
If the rail is only slightly out of position, you may be able to move the brackets. If the rail is far outside the required range, reinstall it rather than trying to compensate with loose hardware.
The rail ends create a hazard
A rail that stops abruptly can catch clothing or create a sharp projection. Return the ends to the wall when practical, or use a code-appropriate termination.
Do not leave rough cuts, exposed bolts, or pointed ends where people pass.
The wall is made of plaster or masonry
Plaster may crack if drilled without care. Masonry needs anchors designed for concrete or brick, and the anchor capacity must match the expected load.
For tile, avoid drilling through the tile unless you have the right bit and can identify the wall structure behind it. A tile surface alone cannot support a handrail.
There is no stud where the bracket needs to go
Do not shift the entire rail to an unsafe height just to reach a stud. Install solid blocking behind the wall if the project allows access. If the wall is closed, a surface-mounted structural backing board may be an option, but it must be designed and fastened properly.

Safety and Code Checks Before You Finish
A handrail installation is not complete until the stairway and its surroundings are checked.
Confirm the following:
- The rail is 34 to 38 inches above the stair nosings, where that range applies.
- The rail is easy to grip.
- The rail has at least 1½ inches of wall clearance.
- Brackets are secured to studs, blocking, posts, or other structural framing.
- The rail does not stop where it blocks a doorway or walkway.
- Extensions are long enough for the applicable code.
- Ends are returned or finished safely.
- The rail does not interfere with a required guard.
- The stair lighting is adequate.
- The handrail does not have splinters, sharp corners, or loose parts.
For a building permit, inspection, rental property, commercial building, or major remodel, contact the local building department before work begins. Ask which code edition applies and whether a permit or inspection is required.
The ICC Digital Codes site provides access to code publications, including the International Residential Code. OSHA and the U.S. Access Board apply to different building types and uses, so do not use their rules as a direct replacement for local residential requirements.
When to Hire a Professional
Hire a qualified contractor, carpenter, or building professional when:
- The stairway is open on one or both sides.
- Posts or stringers move.
- You cannot locate framing.
- The wall contains unknown wiring or plumbing.
- The rail connects to a guard system.
- The project involves a commercial or multifamily building.
- The stairs are unusually steep, curved, or irregular.
- A permit or inspection is required.
- Someone in the home depends on the rail for mobility support.
A basic wall-mounted rail is often suitable for a careful DIY installation. Structural uncertainty is the point where professional help becomes more valuable than saving a few hours.

Key Takeaways
- Install the rail so it is usually 34 to 38 inches above the stair nosings.
- Fasten brackets to studs or solid blocking, not drywall alone.
- Use a handrail profile that a person can wrap their hand around.
- Leave at least 1½ inches of clearance from the wall where applicable.
- Plan safe extensions beyond the top and bottom risers.
- Check local U.S. building requirements before starting.
- Test the finished rail for movement, sharp edges, and obstruction.
FAQs
Can I install a stair handrail with drywall anchors?
Drywall anchors alone are not a good choice for a stair handrail. People may place their full body weight on the rail. Attach the brackets to studs, wood blocking, masonry, or another structural support designed for the load.
How high should a stair handrail be?
For many U.S. residential stairways, the handrail is installed 34 to 38 inches above the stair nosings. Measure vertically from the front edge of each tread. Confirm the exact requirement with your local building department.
Does a stair handrail need to extend past the steps?
Many residential codes require the handrail to extend at least 12 inches beyond the top and bottom risers. The rail may return to the wall or end in another approved way. Local conditions can change the required design.
Can a 2-by-4 be used as a handrail?
A 2-by-4 may not provide a code-compliant grasp. A handrail needs a shape and size that allow a secure grip. If you use a rectangular rail, check its perimeter, edges, and maximum dimensions against the applicable code.
How many brackets does a stair handrail need?
The number depends on the rail length, material, bracket design, and framing. Place brackets at structural support points and follow the rail and bracket manufacturer’s instructions. A long rail usually needs several evenly distributed supports.
Do both sides of a staircase need handrails?
Not always. The requirement depends on stair width, building type, local code, and whether one side is open. Wide or public stairs may require handrails on both sides. Ask your local building department when the stairway is wide or unusual.
Conclusion
To install a stair handrail, measure from the stair nosings, set the rail at the required height, locate solid framing, install suitable brackets, and test every connection. The strongest improvement over a decorative rail is a structural one: the rail must stay secure when someone depends on it.
For a typical U.S. home, verify the local code before drilling. If the wall, stair framing, or guard system is unclear, get professional help rather than guessing.

Michael Reynolds is a senior contributor at RetirementGazette.com, where he focuses on helping readers navigate the journey toward a secure and fulfilling retirement. With over a decade of experience in personal finance, retirement planning, and lifestyle writing, Michael combines practical strategies with easy-to-understand guidance tailored for both pre-retirees and those already enjoying their golden years.